MatrixEditor
Phase One - Initial Setting
- Open Matrix Editor from Start Menu -> Programs -> DarkBASIC -> MatrixEditor v1.6b
- There will be 3 options. Choose appropriate option according to your needs. Right now choose 1.
- Create a New Matrix
- Load a Previous Matrix
- Continue The Last Matrix
- Type the name of your project (Name of the game you want to develop) and press enter. It will create a Project Workspace Folder in DarkBASIC\Project according to the name you provided.
- Select the textures you want. (They are in DarkBASIC\Tiles Folder. You can copy more bitmaps there manually. They will appear here.) After selecting required textures, press exit.
- Now What is the texture?
- It is basically an image you will use to paint the tiles of the matrix
- You will be asked to modify parameters. I would advise to use pixel width & depth 3000. i.e. a 3000x3000 pixel matrix. You can use smaller values, but for higher values, the number should be a multiple of 3000 for smoother performance. (Note that the default is 100000, so you have to change this manuallky. Click on value, type new value & press enter.)
- Now the Matrix Tiles are 25x25. Means 25 tiles horizontally & 25 vertically. Total 625 tiles. You can keep it as it is or you can change the amount. Depends upon how many tiles you want in your matrix.
- Suppose you keep 1x1, it means 1 tile. 2x2 means total 4 tiles.
- If you keep one tile only, you will be able to apply 1 texture.
- If you have more tiles, you can color different parts of your matrix differently. Like, suppose you are going to have a mountain and a lake in your matrix, you may want to texture them differently. So generally 25x25 serves purpose for current setup but if you use 6000x6000 pixels, u might want to set them to 60x60.
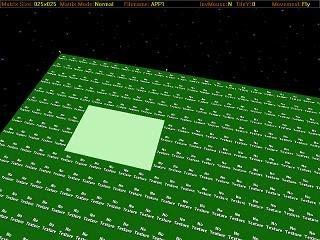
- Click OK and you will have your matrix set up. It looks like a square ground. It will not be textured by default, and the height of all tiles is set zero.
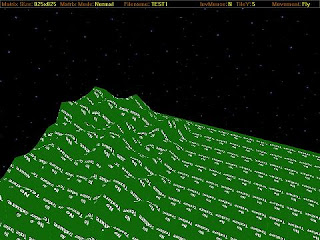
We know that real ground does not look like a plain. Of course if you want it that way, it's your choice, but I want to make it look like a real ground.1st step is to make this plain imbalanced. i.e. All tiles has 0 height. We will change them.
- To do that, 1st we need to select a tile. That can be done by arrow keys.
- If you wish to select a group of tiles, select Shift+Arrow Keys.
- Now, simply use + or - (NumPad) to increase or decrease height of a tile(s).

- The Fig. shows selected area (in this fig. the height has not been increased yet)
- After you are finished, if you are satisfied, start texturing, otherwise continue.
- Now lets say, we don't want to do this manually. So select an area to modify and press H. You will see a range of options. Do what you like. You can create mountain, lake, pyramid, wall etc. or you can even randomize the area.


Phase Three - Texturing
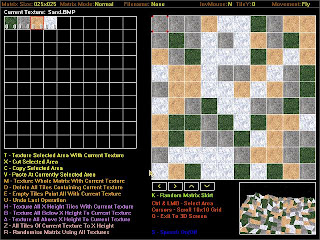
- Simply press T and you will be led to a texture editor which has a 2D view of the Matrix. Click on the texture and then click on the part you want to paint. Or you can use several auto options mentioned there.
- If you want to add more textures to your Project then
- Exit the Texture Mode
- Press E
- Add more textures
- Click on Exit
- Return to Texture Mode by pressing T

Phase Four - Exporting
Now we will export this Matrix, so that DarkBASIC can import it and use it.
- Press B to build the matrix. It will actually export the matrix & texture files. Suppose our project name is Proj1. It will export Proj1.MDF & _Proj1.BMP to Proj1 Folder in DarkBASIC\Projects.
- Before we can use it, we must rebuild it. For that we will have to use another tool MatrixRebuild.
MatrixRebuild
- Open Matrix Editor from Start Menu -> Programs -> DarkBASIC -> MatrixRebuild v1.0
- Type the name of the project you want to ReBuild (In this case Proj1) and press Enter
- This process will export 2 more files into your Project Folder. Proj1.dba & LoadMatrix.dba
- Now you are all set! This Proj1.dba will be your main program file. Open it from dark basic to do the actual programming.
- During the programming, whenever you want to load this Matrix, simply call the function LoadMatrix("ProjName",MatrixID).
- MatrixID is an integer identifier to identify this matrix. Whenever you want to use commands associated with this matrix, you will use this ID. Since, we generally use one matrix in one level, so your ID will be naturally 1.
- Example - LoadMatrix("Proj1",1)


No comments:
Post a Comment